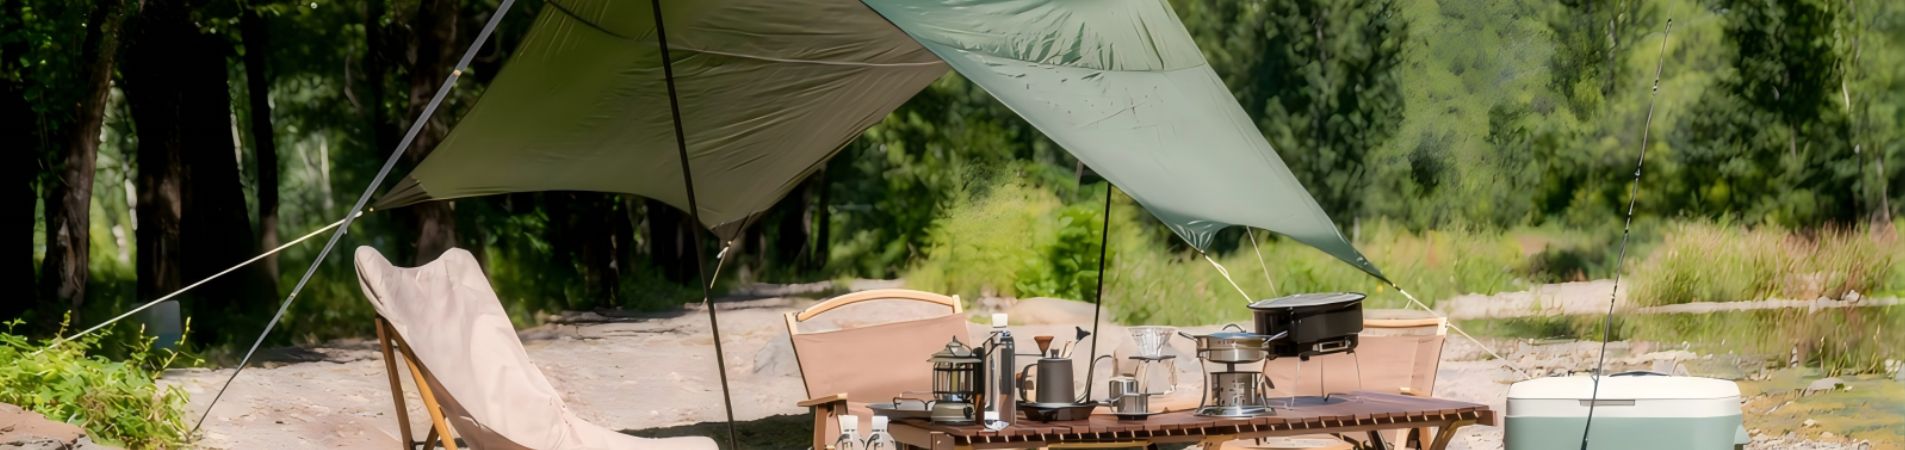
Introduction
For procurement managers, outdoor retailers, and product developers, selecting and supplying reliable camping tents is more than a buying decision — it directly affects customer satisfaction, product returns, and long-term brand reputation. Tents operate in harsh environments and are exposed to wind, rain, abrasion, and repeated assembly cycles; small failures in fabric, seams, zippers, or poles can quickly escalate into costly field problems and negative reviews. That’s why understanding common failure modes and practical repair strategies is essential for anyone responsible for sourcing, storing, or reselling outdoor gear.
This guide distills manufacturer insights and field-tested solutions into a concise reference targeted at B2B buyers and product teams. Rather than generic tips, you’ll find diagnostic cues that help differentiate between a correctable wear issue and a structural failure that warrants replacement. Each section explains why a problem occurs (material or design cause), how to perform a reliable repair or temporary field fix, and what specification or QA checks to require from suppliers to reduce recurrence.
Whether you are evaluating new OEM partners, preparing technical product sheets, or training after-sales teams, the following eight problem areas — from leakage and seam failures to pole damage and setup errors — will help you make better procurement choices and support end users more effectively. Read on to learn practical steps to diagnose, fix, and prevent the most common camping tent issues.
- Introduction
- 1. Tent Leakage During Rain
- 2. Broken or Bent Tent Poles
- 3. Torn or Punctured Tent Fabric
- 4. Zippers Getting Stuck or Not Closing
- 5. Condensation Inside the Tent
- 6. Difficulty Setting Up the Tent
- 7. Tent Stakes Pulling Out in Wind
- 8. Mold or Bad Smell in the Tent
- When to Consider Replacing Your Tent
- Tips to Extend the Lifespan of Your Camping Tent
- Conclusion
1. Tent Leakage During Rain
Tent leakage is one of the most frustrating issues campers encounter, especially during multi-day trips or heavy rainfall. From a manufacturing standpoint, waterproof performance depends on several engineering factors: the strength of the PU or silicone coating, the quality of seam sealing, the tear resistance of the fabric, and how well the rainfly is tensioned during setup. Over time, coatings naturally degrade due to UV exposure, fabric flexing, repeated packing, and humidity. Even premium tents—whether used for family camping or professional outfitting—are susceptible to leakage once materials begin to fatigue or stitching lines lose their protective sealant.
Diagnosing leakage requires careful inspection. Water commonly enters through three high-risk zones: seam lines, surface fabric, and the tent floor. Seam failures occur when factory-applied seam tape peels off or the thread holes expand under tension. Fabric leakage typically happens when the waterproof coating thins or micro-abrasions allow moisture to penetrate. Floor leakage, on the other hand, is usually caused by ground pressure—when a camper kneels, sits, or places heavy items on wet soil, water is forced upward through the fabric’s hydrostatic head limit. In many cases, leakage is not the result of a manufacturing defect but improper site selection, such as pitching the tent on low ground where water pools.
To prevent future leakage, always inspect seam taping before your trip and reapply seam sealer if any edges are lifting. Avoid storing a damp tent, as moisture accelerates coating breakdown and mold formation. During setup, ensure the rainfly is tensioned evenly to prevent water from collecting in pockets. Choosing an elevated, well-drained campsite is equally crucial—manufacturers see floor damage most frequently in tents pitched on saturated soil.
- Fix Step 1: Completely dry the tent, then inspect all seams for peeling seam tape or visible needle holes. Clean the area before applying seam sealer.
- Fix Step 2: Recoat the tent fly or inner fabric using a PU or silicone-based waterproofing treatment to restore water repellency.
- Fix Step 3: Adjust the rainfly tension and ensure proper guyline setup to keep the fly off the inner tent and eliminate pressure points where water may pool.
- Fix Step 4: If leakage occurs from the floor, reposition the groundsheet so it does not extend beyond the tent’s footprint, preventing water from channeling underneath.
2. Broken or Bent Tent Poles
Tent poles are the structural backbone of the tent, responsible for maintaining shape, stability, and wind resistance. From a manufacturer’s perspective, pole failure typically occurs at predictable stress points—near ferrule joints, at the ends where tension is highest, or along sections repeatedly flexed during setup. Aluminum alloy poles, while strong and lightweight, can bend when subjected to lateral pressure or improper assembly. Fiberglass poles, on the other hand, are more prone to splintering when overloaded or exposed to cold temperatures, which reduce their elasticity. In many cases, pole damage is not due to material quality but incorrect pitching techniques, such as forcing poles into tight curves or assembling them in the wrong order.
Identifying the extent of damage is crucial before attempting repairs. A clean bend in an aluminum pole can often be reshaped, but a sharp crease indicates structural fatigue and requires reinforcement or replacement. Fiberglass fractures usually appear as splintering along one side of the pole or a complete snap under tension. During field use, pole damage often happens during sudden gusts of wind when guy lines are not properly anchored, causing the frame to collapse inward. Another common cause is inserting the pole tip into the wrong grommet or pushing instead of pulling the pole during assembly, which increases the risk of cracking.
To prevent future pole issues, avoid bending poles at extreme angles and always assemble them by sliding each section together without forcing the joints. Ensure that all guy lines are tensioned correctly, especially in windy conditions. Manufacturers also recommend periodically checking shock cords—the internal elastic line—as weakened shock cords can cause uneven stress distribution along the pole segments. Proper storage, preferably in a straight and dry condition, will further extend the pole’s service life.
- Fix Step 1: For bent aluminum poles, gently straighten the curve using steady pressure. Avoid bending back and forth, as this weakens the metal.
- Fix Step 2: For cracked or splintered fiberglass poles, use a repair sleeve (often included with tents) to reinforce the damaged section and secure it with strong tape.
- Fix Step 3: Replace severely damaged sections with manufacturer-approved pole segments to ensure proper tent geometry and stability.
- Fix Step 4: Reinforce pole tension by properly securing guylines and checking that the tent is evenly pitched to reduce stress during wind.
3. Torn or Punctured Tent Fabric
Torn or punctured tent fabric is a common issue that ranges from small pinholes caused by abrasive surfaces to larger rips from branches, stakes, or improper handling. From a manufacturing perspective, fabric failures typically occur where abrasion and concentrated stress meet—door edges, vestibule corners, and areas where guy lines transfer load to the canopy. Fabric quality (ripstop weave, denier rating, and coating thickness) defines baseline resistance, but real-world causes often include friction against rocks, dragging the tent during setup, or sharp objects in a packed bag. Repeated folding at the same creases can also weaken coatings and create micro-fractures that eventually become visible tears.
Diagnosing the problem involves examining both the visible damage and the fabric’s surrounding structure. Small punctures may not affect structural integrity but will reduce hydrostatic head performance and create entry points for insects. Larger tears—especially ones that extend into seams or near stress points—can alter the load path of the entire tent, increasing the risk of further damage under wind or weight. Also inspect the interior coating: if the silicone or PU layer has delaminated near the tear, a simple patch may not adhere well unless the surface is properly prepared.
Repair success depends on correct materials and surface preparation. For minor punctures and tears under 2–3 cm, factory-grade ripstop repair tape or solvent-activated patches provide fast, durable fixes. For larger or irregular tears, a sewn patch reinforced with seam sealer offers a more permanent solution—this is the method manufacturers recommend for high-stress zones. If the tear reaches a seam, consider re-stitching with UV-resistant, bonded thread and re-taping the seam to restore waterproofing. When repairing in the field, temporary solutions like duct tape can hold until a proper repair is possible, but they should be followed by a workshop-quality restoration.
- Fix Step 1: Clean and dry the damaged area; remove dirt and residual coating flakes so patches adhere well.
- Fix Step 2: For small holes, apply ripstop repair tape on both inner and outer surfaces when possible; press firmly and cure per product instructions.
- Fix Step 3: For larger tears, stitch a fabric patch (use ripstop or matching denier fabric), then apply seam sealer around stitch lines and recoat the patch area with waterproofing treatment.
- Fix Step 4: If the tear affects seams, re-stitch with bonded UV-resistant thread and apply seam tape or seam sealer to restore waterproof integrity.
- Field Tip: Use duct tape or a temporary adhesive patch to stop progressive tearing in the field, then perform a permanent repair at home or at a service center.
4. Zippers Getting Stuck or Not Closing
Zippers are one of the most frequently used components of a camping tent, which means they also experience the most wear and tear. Dirt, fabric tension, misaligned tracks, or damaged teeth can cause zippers to get stuck, separate during use, or fail to close completely. These issues not only frustrate campers but also compromise ventilation, weather protection, and overall tent performance.
Causes
- Dirt, sand, or debris buildup inside the zipper track.
- Fabric tension pulling the zipper teeth out of alignment.
- Worn or bent slider that no longer clamps the teeth together firmly.
- Damaged or missing zipper teeth caused by rough handling or prolonged use.
How to Fix It
- Clean the zipper track: Use a soft brush or cloth to remove sand, dust, and debris. Lubricate the zipper with candle wax, silicone lubricant, or a zipper-specific product to restore smooth movement.
- Realign the fabric: If fabric is pulling the zipper too tight, adjust tent tension straps or reposition the tent body to relieve pressure.
- Tighten the zipper slider: Using pliers, gently press both sides of the slider to restore clamping force. This often resolves issues where teeth fail to close properly.
- Repair or replace damaged teeth: If several teeth are missing or broken, replacing the zipper section or the entire zipper line is the most reliable solution.
5. Loose or Leaking Seams
Seams are critical structural and waterproofing components in any camping tent. They connect fabric panels, distribute tension, and create weatherproof barriers against rain and wind. When seams loosen or begin to leak, the tent’s overall integrity is compromised—allowing water to seep through needle holes, stitching gaps, or deteriorated seam tape. From a manufacturer’s standpoint, seam reliability depends on several key factors: stitch density, thread type, seam construction method (e.g., flat-felled or lap seam), and the quality of polyurethane or silicone seam taping applied during production.
Many seam failures occur due to long-term material fatigue. Constant stretching from tensioned poles, UV exposure, and repeated packing can wear down thread fibers or cause seam tape to peel. Moisture trapped during storage accelerates adhesive breakdown, leading to delamination. Field conditions can also contribute to seam issues: pitching the tent on uneven ground can cause excessive strain at particular seam junctions, while heavy rain may exploit even minor weaknesses. In older tents, waterproof coatings around seams may flake or crack, further increasing leakage risk.
Accurate diagnosis involves inspecting both the interior and exterior seam lines. Look for lifted tape edges, exposed needle holes, frayed stitching, or areas where fabric panels are separating. Gently apply pressure with your fingers—if water seeps through or if the tape lifts easily, targeted repair is needed. In severe cases, sections of seam tape may need to be fully removed and replaced. Most leaks, however, can be resolved through cleaning, re-sealing, and reinforcing high-stress points.
- Fix Step 1: Clean the seam area thoroughly with mild soap and water; allow it to dry completely to ensure proper adhesion of sealers or tape.
- Fix Step 2: Apply a high-quality seam sealer (PU- or silicone-based depending on tent fabric) along stitching lines to fill needle holes and restore waterproofing.
- Fix Step 3: If seam tape is peeling, remove loose sections carefully and replace with new seam tape using a compatible adhesive or heat-activated bond.
- Fix Step 4: Reinforce high-stress joint areas with additional patching or double-sealing if the tent is used frequently in heavy rain or wind.
- Field Tip: Keep a small bottle of seam sealer in your repair kit; even a thin emergency coat can prevent water ingress during unexpected storms.
6. Condensation Buildup Inside the Tent
Condensation is a common and often overlooked issue in camping tents, occurring when warm, moist air inside the tent comes into contact with cooler fabric surfaces, resulting in water droplets forming on walls, ceilings, and gear. From a manufacturer’s perspective, condensation is primarily a matter of ventilation and material properties. Single-layer tents or tents with low-breathability fabrics are more susceptible because moisture cannot escape efficiently. Even high-quality double-layer tents can develop condensation if ventilation ports are blocked or if campers tightly seal the doors and rainfly to prevent rain ingress.
Several factors contribute to excessive condensation. Activities inside the tent such as cooking, breathing, or drying wet clothing generate humidity. External conditions, including cold nights or rapid temperature drops, exacerbate condensation as the temperature differential between interior air and tent fabric increases. Incorrect pitching also plays a role: tents placed too close to trees or low-lying areas can trap cool, damp air around the tent, increasing the condensation rate. Manufacturers often design tents with mesh inner layers and vents to reduce this effect, but improper use can nullify these design features.
Preventing condensation involves both strategic setup and daily management. Ensure vents are open and unobstructed to allow cross-ventilation, especially when using the tent with the rainfly in place. Position the tent on slightly elevated ground away from dew-prone areas or water bodies. Avoid storing wet gear inside overnight, and encourage airflow by partially opening doors or vestibules when conditions permit. If condensation occurs, wiping down wet surfaces with a soft cloth and allowing the tent to dry before storage helps maintain fabric integrity and prevent mold growth.
- Fix Step 1: Open all ventilation panels and mesh windows to increase airflow and reduce internal humidity.
- Fix Step 2: Remove wet clothing, shoes, or gear from the tent overnight to prevent additional moisture accumulation.
- Fix Step 3: Tilt or reposition the tent to a slightly elevated, breezy location to minimize exposure to cold, damp ground air.
- Fix Step 4: For high-condensation areas, consider using a tent-specific moisture absorber or small portable vent fan.
- Field Tip: Always pack and store the tent completely dry; trapped moisture accelerates fabric wear, coating degradation, and mold formation.
7. Tent Stakes Pulling Out in Wind
Tent stakes are essential to maintaining a tent’s stability by anchoring the structure firmly to the ground. When stakes pull out during strong wind, the tent can shift, collapse, or suffer fabric and pole damage. From a manufacturer’s standpoint, stake performance depends on three factors: material strength, stake geometry, and ground compatibility. Lightweight wire stakes, for example, are efficient for soft soil but perform poorly on rocky or sandy terrain. V-shaped or Y-shaped stakes offer superior holding power but may be more difficult to drive into compact surfaces.
Stake failure typically occurs because of improper anchoring techniques or unsuitable stake types for the terrain. In high winds, vertical stake placement is one of the most common mistakes—wind pressure gradually loosens the soil around the stake until it no longer holds. Ground conditions also play a major role: loose sand, gravel, or water-saturated soil cannot provide enough friction for standard stakes. Incorrect tent orientation can further intensify the issue; pitching the tent with the broadest side facing the wind increases structural load and makes stake failure more likely.
Diagnosing the root cause involves examining both the stake and the soil. If the stake is bent, the material may be too lightweight for the conditions. If the soil around the stake is loose or disturbed, the anchoring angle was likely incorrect. An effective setup includes selecting the right stake type, placing stakes at a proper 45-degree angle, and ensuring guy lines distribute load evenly across the tent. In extreme conditions, using natural objects (rocks, logs) or sand anchors can significantly improve tent stability.
- Fix Step 1: Reinsert stakes at a 45-degree angle facing away from the tent, which increases resistance against pulling forces.
- Fix Step 2: Use heavier-duty Y-shaped, V-shaped, or spiral stakes when camping in windy, sandy, or soft-ground environments.
- Fix Step 3: Tighten and reposition guy lines to distribute wind load evenly; avoid over-tightening, which may lift stakes upward.
- Fix Step 4: Reinforce anchor points with rocks, logs, or sandbags to increase ground friction and reduce stake movement.
- Field Tip: In very loose soil or snow, bury stakes horizontally (deadman anchor technique) for maximum holding strength.
8. Difficulty Setting Up the Tent
Many campers—especially beginners—struggle with tent setup, and this issue is more common than manufacturers often expect. Even well-designed tents can feel complicated when users are unfamiliar with pole configurations, rainfly orientation, or anchoring sequences. From a production standpoint, setup difficulty typically arises from complex pole geometry, insufficient labeling, or a lack of pre-attached components. Dome tents are generally easier to pitch, while tunnel or multi-room tents may require multiple steps and precise tensioning to achieve optimal structure.
Setup challenges are frequently amplified by environmental conditions. Strong winds, uneven terrain, or low light can make even simple tasks more difficult. Pitching on rocky or sloped ground can misalign pole arcs and put additional stress on the frame. Inexperienced users may also rush the process, resulting in twisted pole segments, reversed rainflies, loose guy lines, or improperly seated grommets. These mistakes reduce stability and can lead to further problems such as leaks or fabric strain.
Diagnosing the root of setup difficulty typically involves reviewing both the tent’s design and user technique. Check whether pole sleeves or clips are clearly marked, whether the rainfly has identifiable color-coded corners, and whether guy-line anchor points are intuitive. Reviewing the user manual—or watching a manufacturer-provided setup video—can quickly resolve most uncertainties. For larger family tents, two-person setup is strongly recommended to ensure balanced tensioning and symmetrical pitching.
- Fix Step 1: Lay out all components (inner tent, poles, rainfly, stakes, guy lines) and identify color-coded parts before beginning setup.
- Fix Step 2: Assemble the pole structure on the ground first, ensuring segments lock securely and no poles are twisted.
- Fix Step 3: Attach the poles to the tent body following the manufacturer’s recommended order—typically front-to-back or center-first for dome tents.
- Fix Step 4: After raising the structure, stake down corners and tension guy lines evenly to prevent misalignment and sagging.
- Field Tip: Practice setting up the tent at home before your trip; familiarity reduces setup time dramatically and helps identify any missing parts.
Conclusion
Camping tents are essential outdoor shelters, but even the best-designed models can encounter issues such as fabric tears, pole failures, seam leaks, condensation, or setup challenges. Fortunately, most of these problems can be resolved through proper diagnosis, routine maintenance, and correct pitching techniques. Understanding why these issues occur—whether due to environmental stress, material fatigue, or user error—helps campers extend the lifespan of their gear and maintain optimal performance during every trip.
At the same time, long-term durability starts with choosing high-quality tents manufactured with precision engineering and strict quality standards. This is where Zhejiang Penglong Technology Co., Ltd. stands out. Based in Ningbo, China, Penglong operates a modern 15,000-square-meter manufacturing facility equipped with advanced production technology and rigorous QC systems. Over the past decade, the company has built a strong global footprint, exporting to more than 80 countries across Europe, North America, Australia, and the Middle East. Its products—ranging from camping tents to outdoor tables, chairs, and carts—are recognized especially in the European market for reliability, durability, and practical design.
As a National High-Tech Enterprise and a Ningbo Specialized and Innovative Enterprise, Penglong holds ISO9001 and CE certifications and owns multiple invention and utility model patents. These achievements reflect the company’s commitment to innovation, safety, and long-term customer value. Whether you are an outdoor enthusiast seeking dependable gear or a professional buyer looking for a trustworthy OEM/ODM partner, choosing tents from a manufacturer with this level of capability ensures fewer field problems and a consistently superior outdoor experience.